Suppose you want to use an AI chat bot service either to support your project or just for fun but you refuse to spend your money for subscription. Or maybe you just have concerns about data privacy that makes you worry about sharing sensitive information.
The good news is that you can absolutely do this by self-hosting an AI server right inside your computer.
In this guide, I’ll show you how to set up your computer as a self-hosted AI server. This experiment can save you money ny eliminating the need for monthly subscription an AI agent or AI chatbot services. Of course, the performance of this setup will largely dependent on your hardware, but I think it deserves a shoot.
As a technical note, this setup is demonstrated on a PC running Ubuntu, fully supported by a dedicated GPU. If you have one then you’re good to go. If you’re using Windows, you can first install Windows Subsystem for Linux (WSL) first then proceed with this tutorial. i’m not covering that on this post.
Installing ollama
First thing first, we have to set Ollama on our machine. Ollama is an AI tool that lets you run Large language models (LLM) locally on your own machine, instead of using cloud-based AI services.
Run the following comman on your terminal.
curl -fsSL https://ollama.com/install.sh | shIf this line appear on the installation status, that mean your GPU is automatically detected by ollama.
>> NVIDIA GPU installed.To test wether ollama is successfully installed, type localhost:11434 into your browser’s address bar. If the page shows a message Ollama is running, then you can continue to the next step.
Test using AI model
While still in the terminal, we are going to pull an AI model using ollama that we installed previously.
Run the following command.
ollama pull llama3This command will downloaded an AI model with 8 billion parameters, whis is a LLM packaged in approximately 4.7 GB of model data. For elaborating what does parameter mean, itis a number inside the neural network. During training, the model adjust these numbers to learn patterns in language, grammar, facts, reasoning, style and relationship between words.
If this following line shows on the installation status, we can continue to test our model.
writing manifest
success
To test our installed AI model, we’ll now try it out.
Run the following command on terminal.
ollama run llama3Type your prompt and see the result.
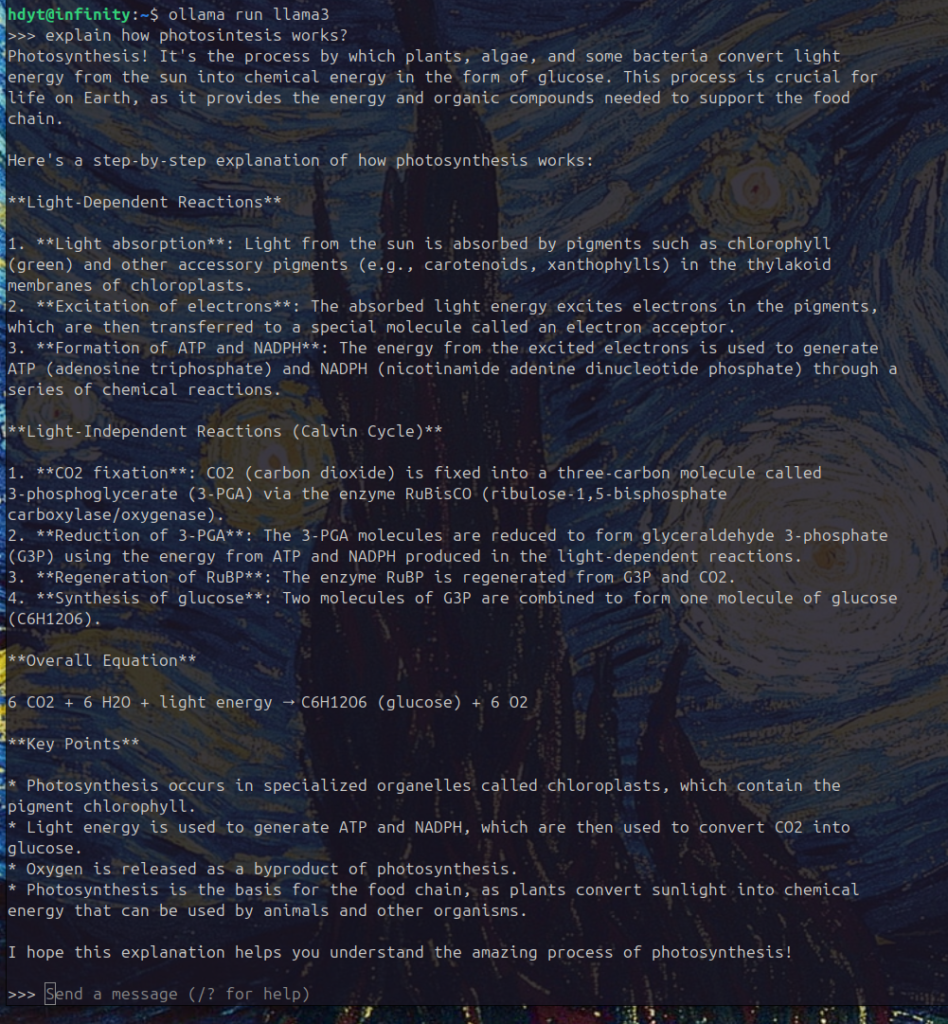
It works! Locally on your machine, no data transferred outside your hard drive.
To check wether the GPU is being used during prompting, run the following command in the terminal.
watch -n 1 nvidia-smi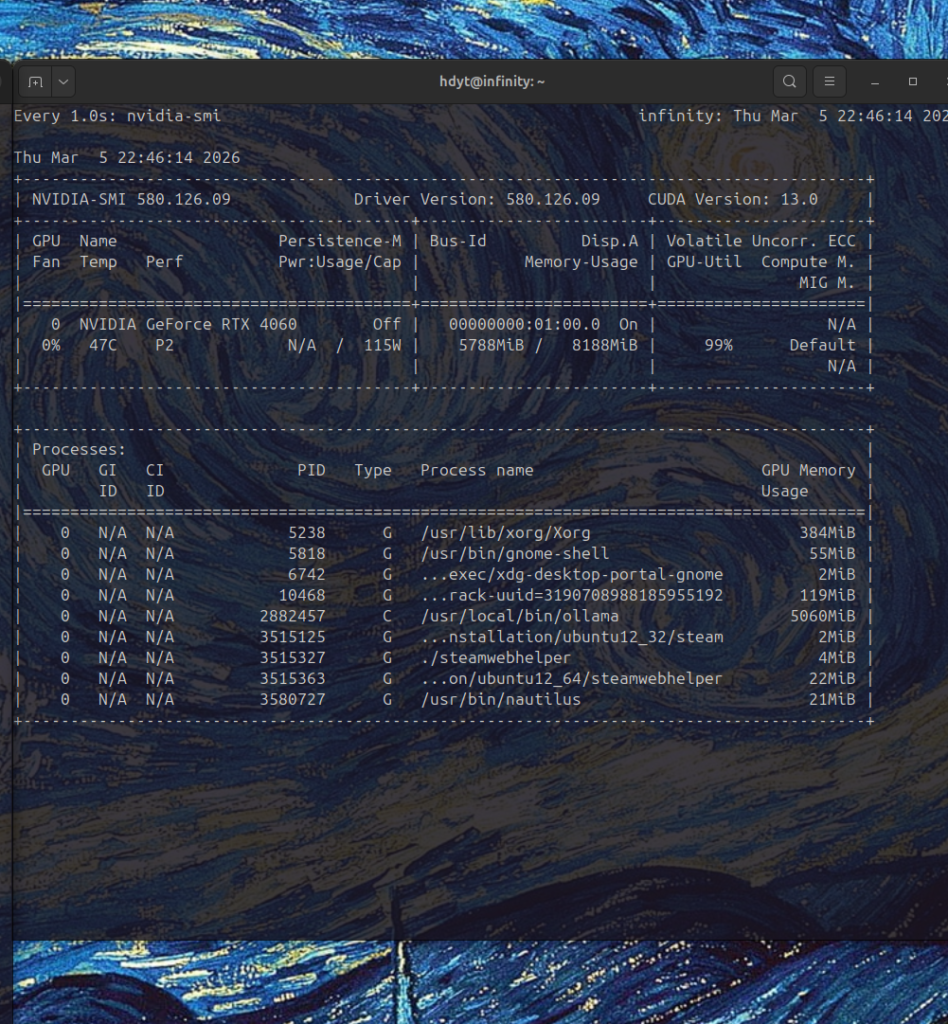
During inference, the GPU workload reaches 99% utilization, indicating that GPU acceleration is working correctly.
To end the session, type
/byeTo make the AI chatbot more practical, next we’ll integrate it with Open WebUI.
Before that, we need to set up Open WebUI first.
See you in the next post.